How to manage users in MySQL via TablePlus GUI?
This post shows you how to create and manage users in MySQL using TablePlus GUI.
If you’re more comfortable with using commands to perform user management tasks, that’s fine, just go ahead with CREATE USER, GRANT, REVOKE statements. But if you want to do it without the hassle of writing commands, TablePlus has it covered.
To start with, make sure you have TablePlus already connected to your MySQL server using a user account with user management privileges, typically an account with root-level access.
From your workspace, navigate to Menu > Connection > User Management…
To create a new MySQL user via GUI
Use the + button at the bottom left of the window to create a new MySQL user.
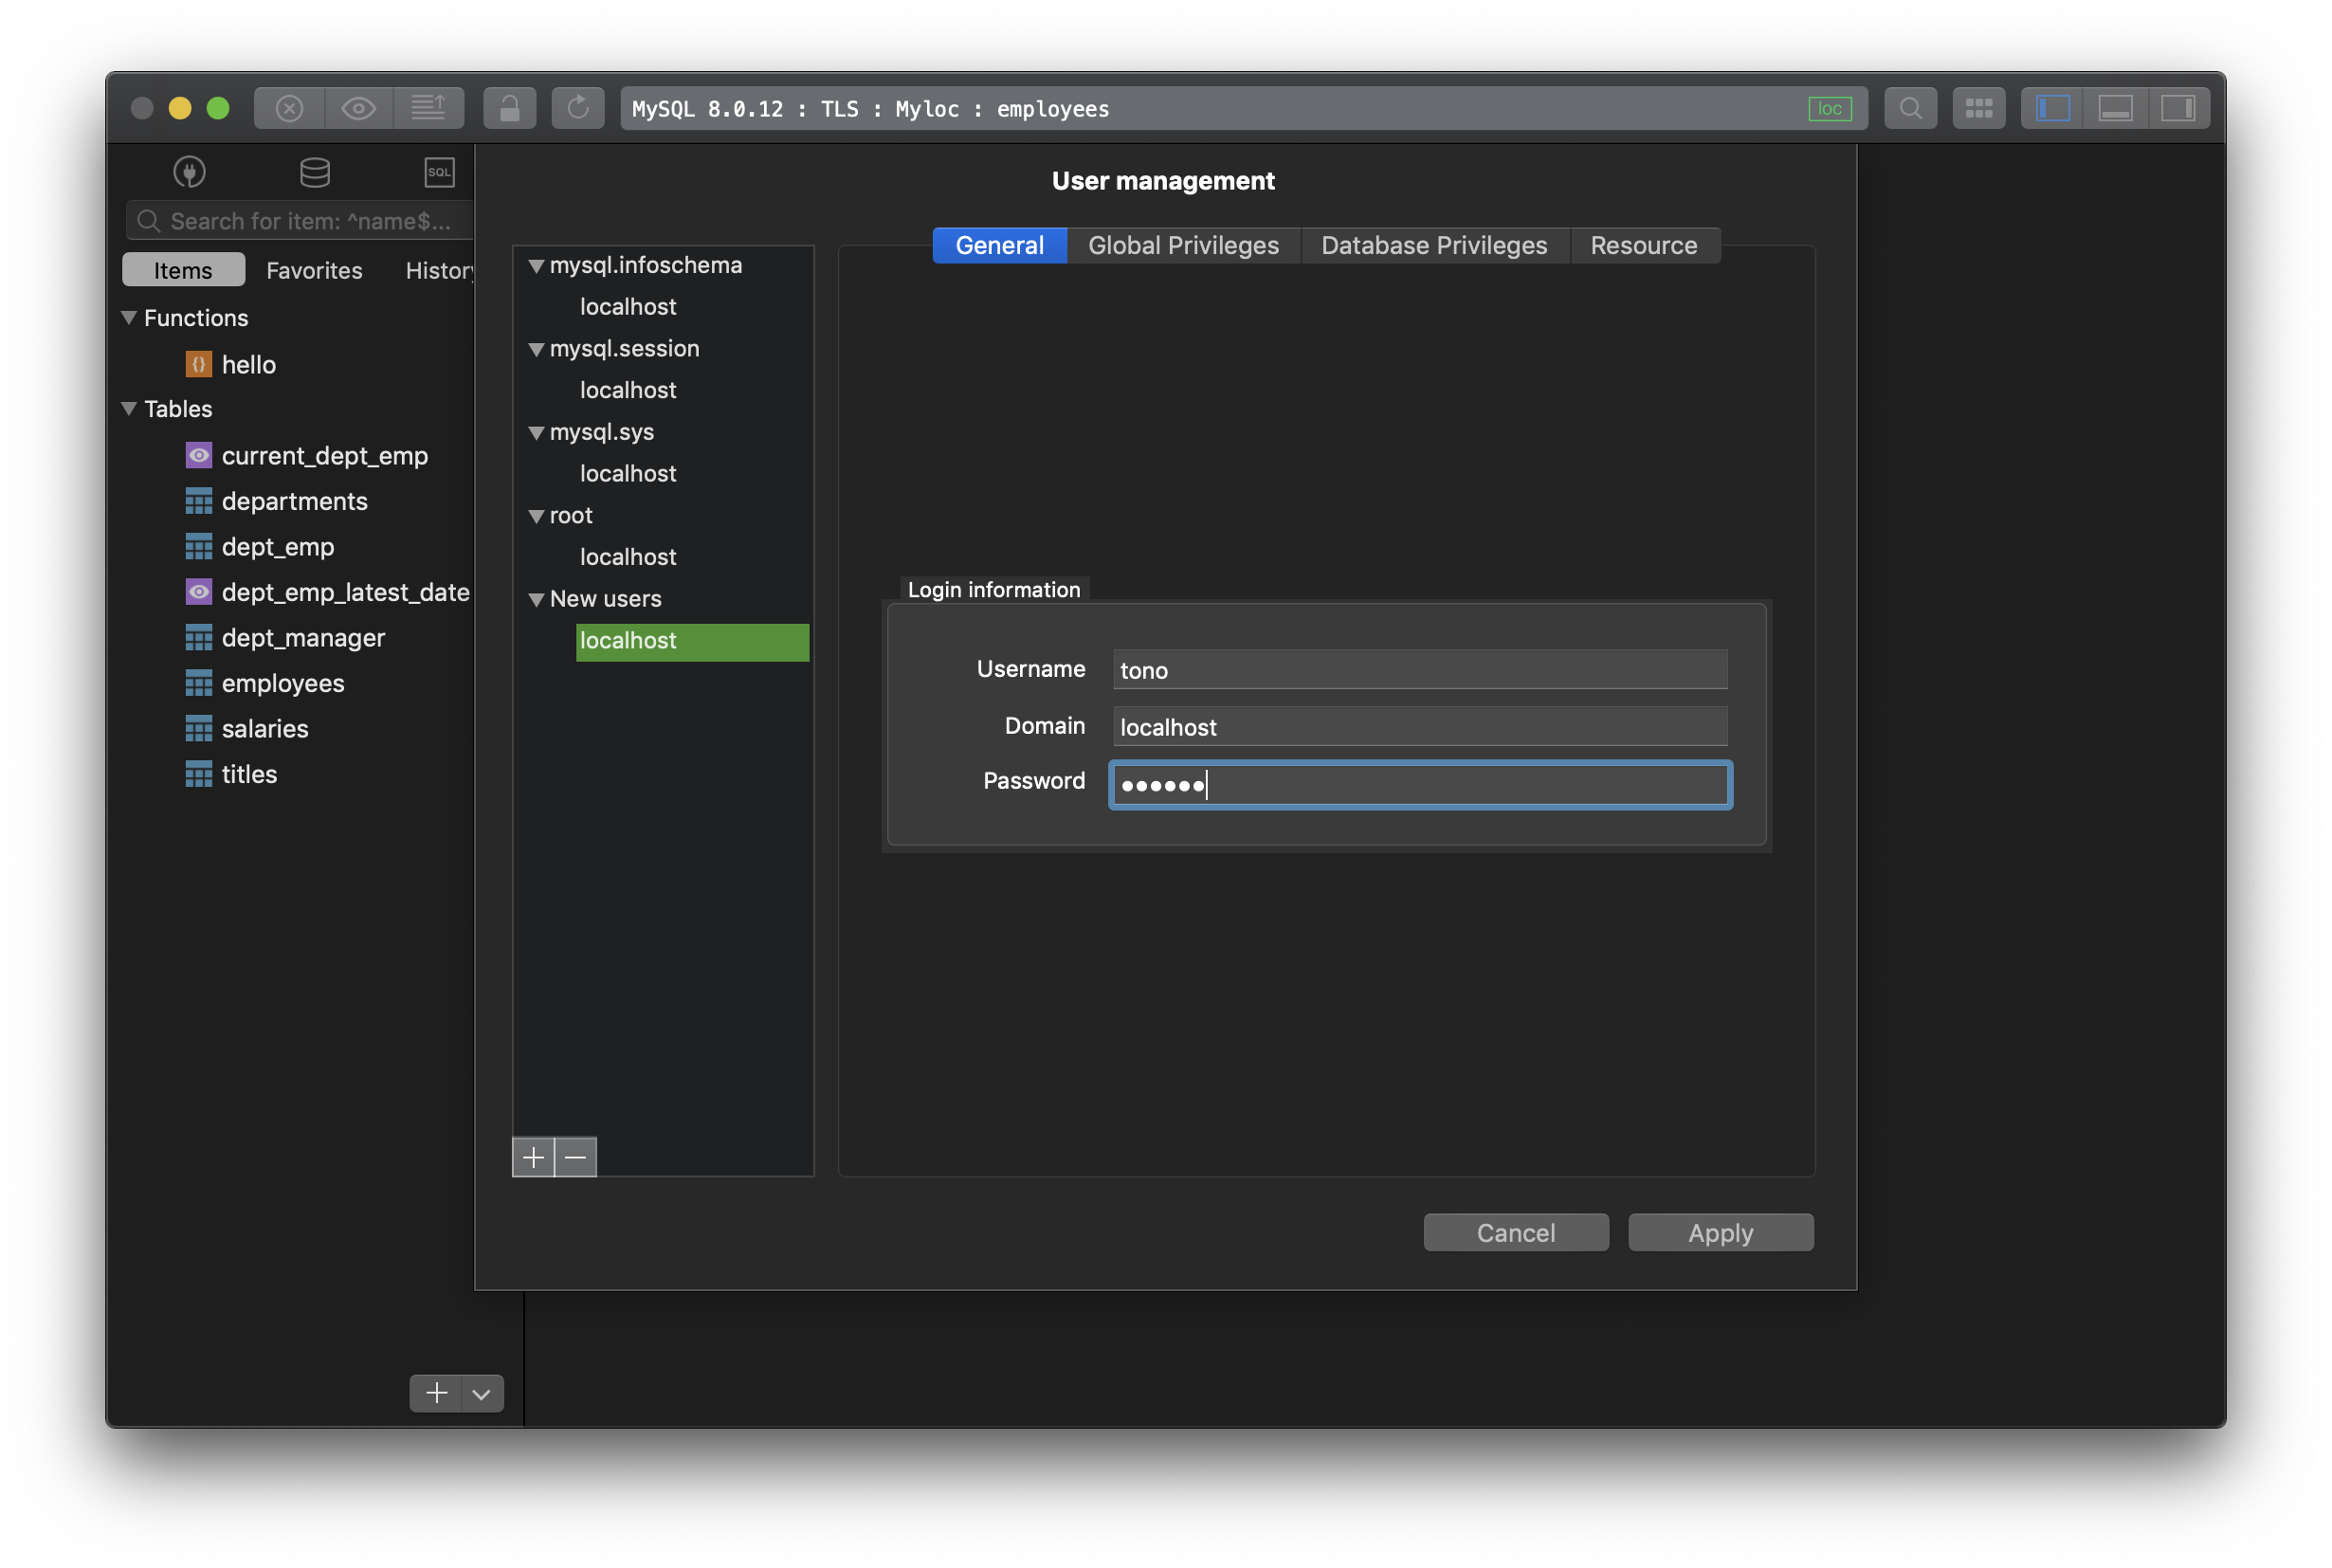
Input the username and password for the new MySQL user you need.
To grant privileges to new MySQL user
1. Global Privileges
If you want to grant global privileges to the new user, switch to the Global Privileges tab and configure.
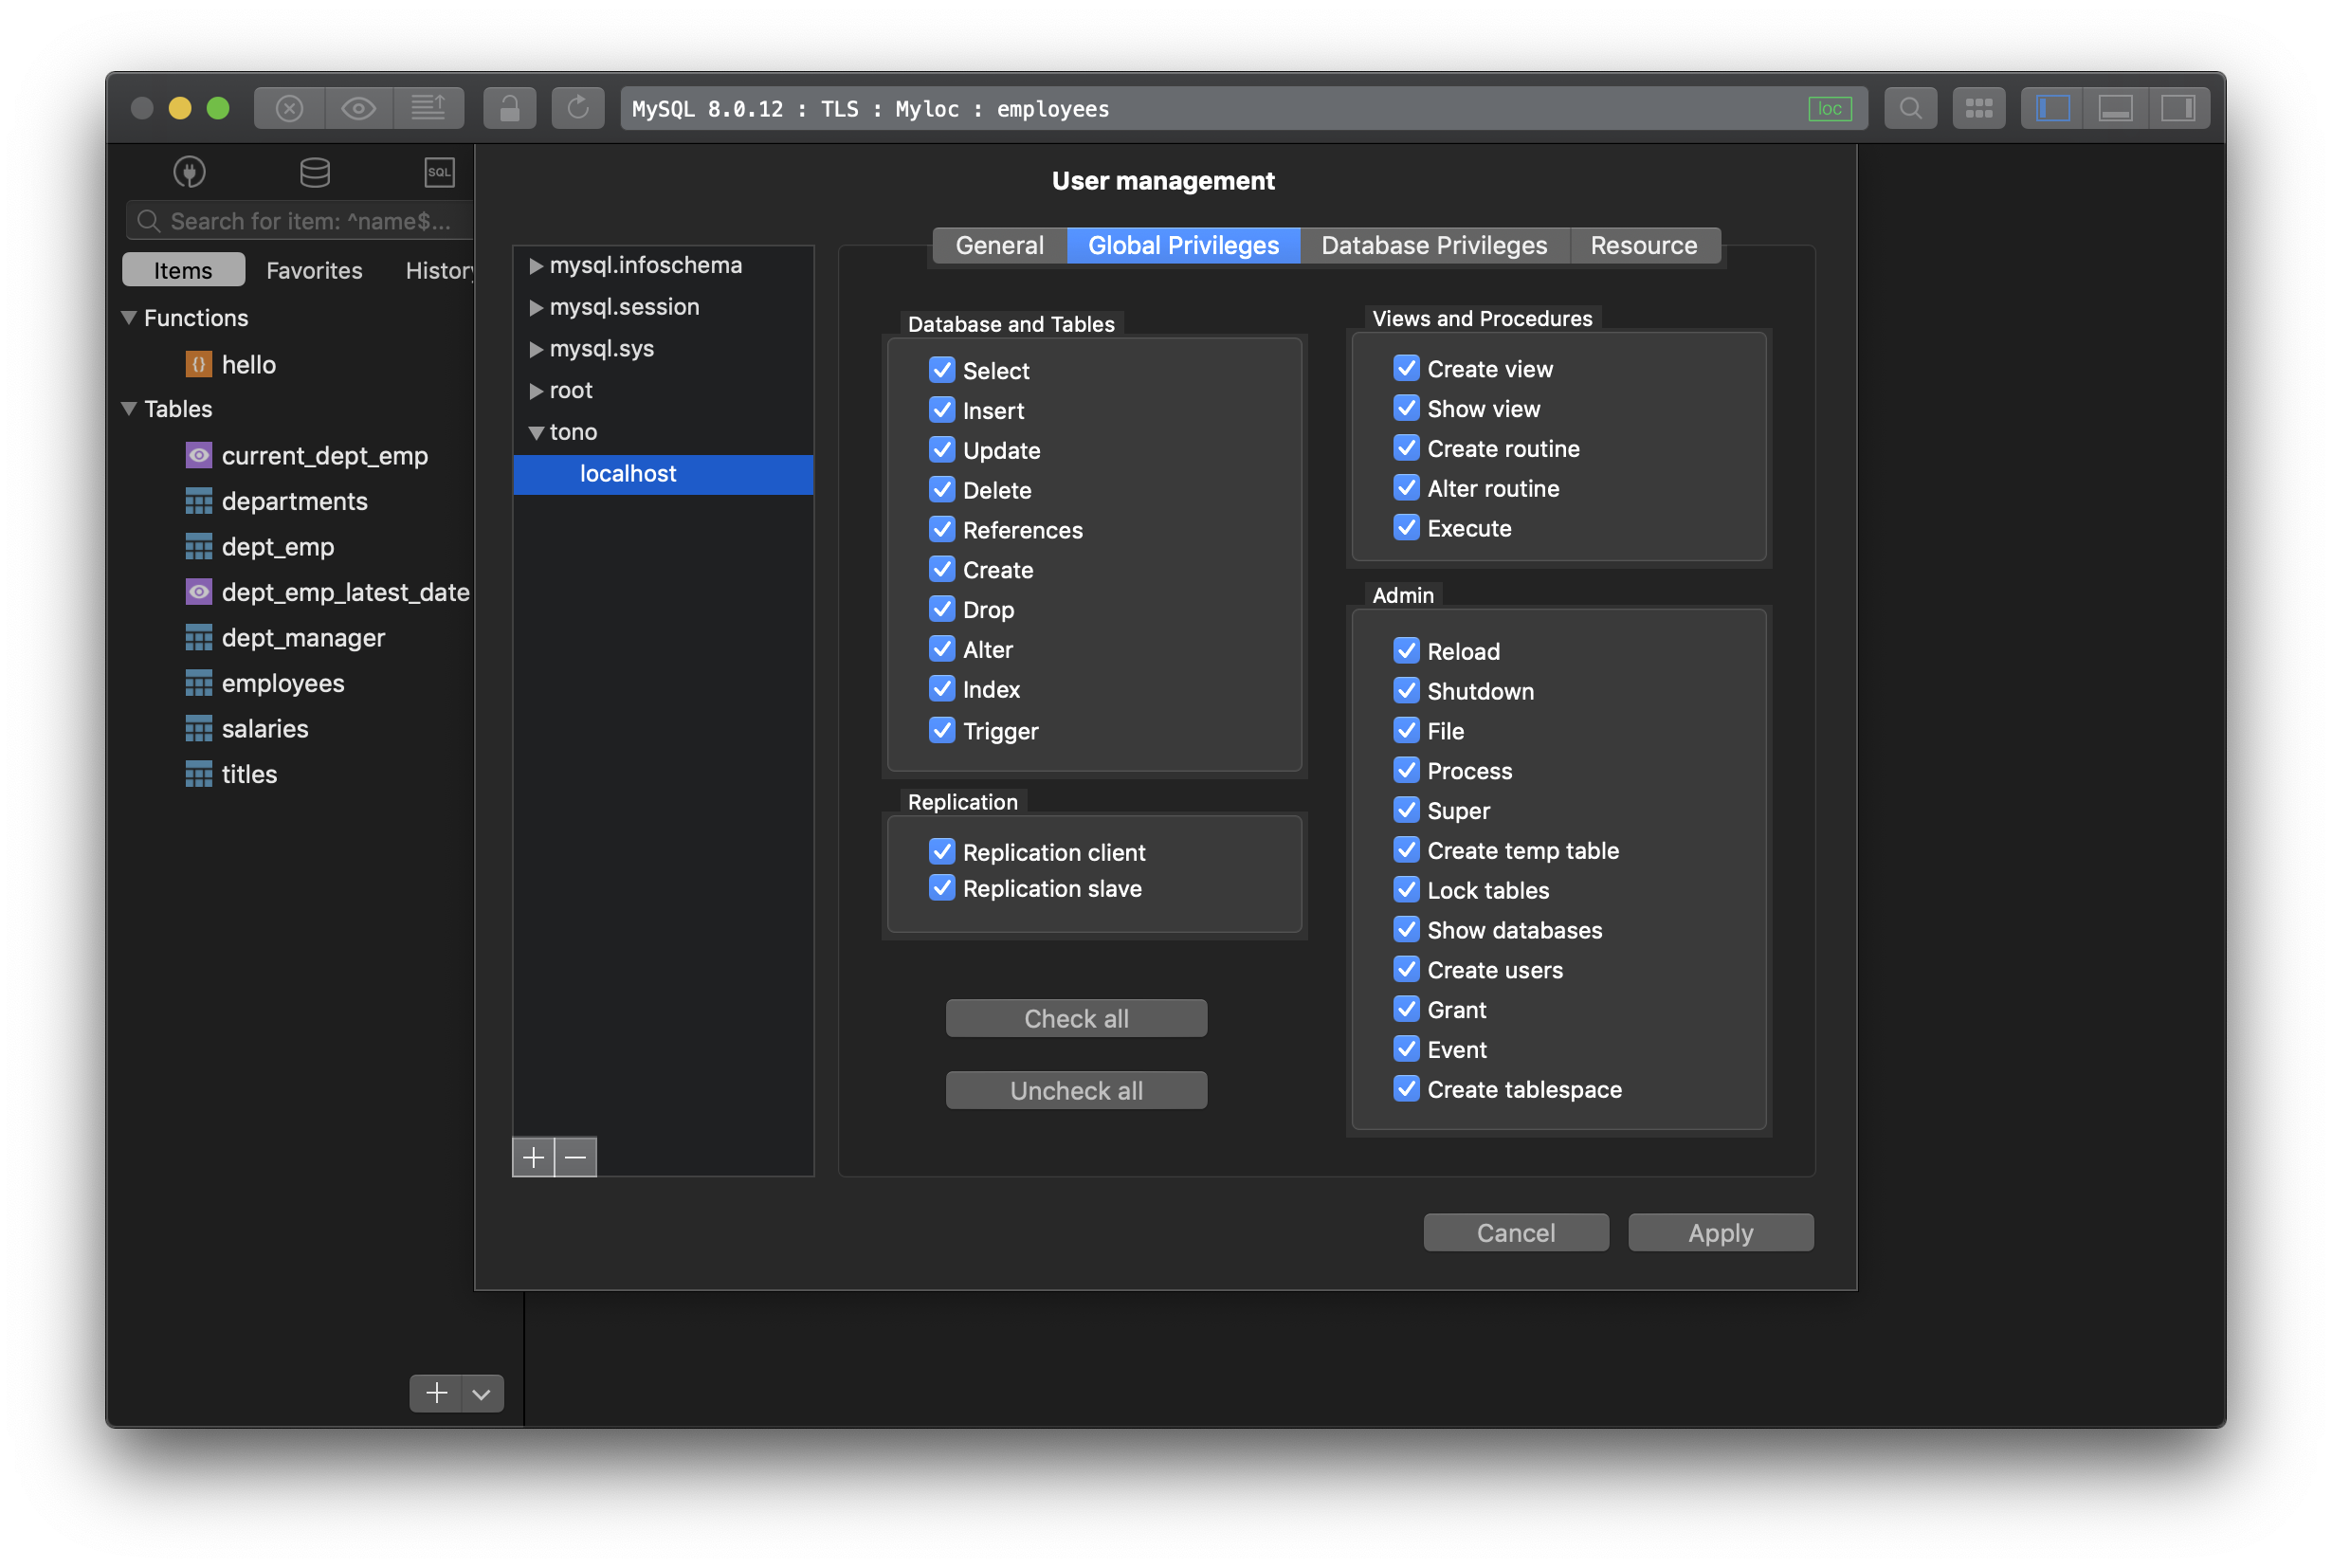
The new user will have certain privileges for all the databases. If you check and grant all privileges from this setting, beware that the new user will have the same power as the default root user. You probably only want to do that to a backup root user account.
2. Database Privileges
In most cases, you will be granting privileges to the new MySQL users based on some specific databases that account should have access to, then use the Database Privileges tab to configure.

Select the database and grant the corresponding privileges to the new user.
3. Set resource limits
An addition setting for the new MySQL user is that you can define the resource limits. This includes:
- Max Updates: The number of updates the account can execute within one hour.
- Max Connections: The number of times the account can connect to the server within an hour.
- Max Questions: The number of queries the account can execute within one hour.
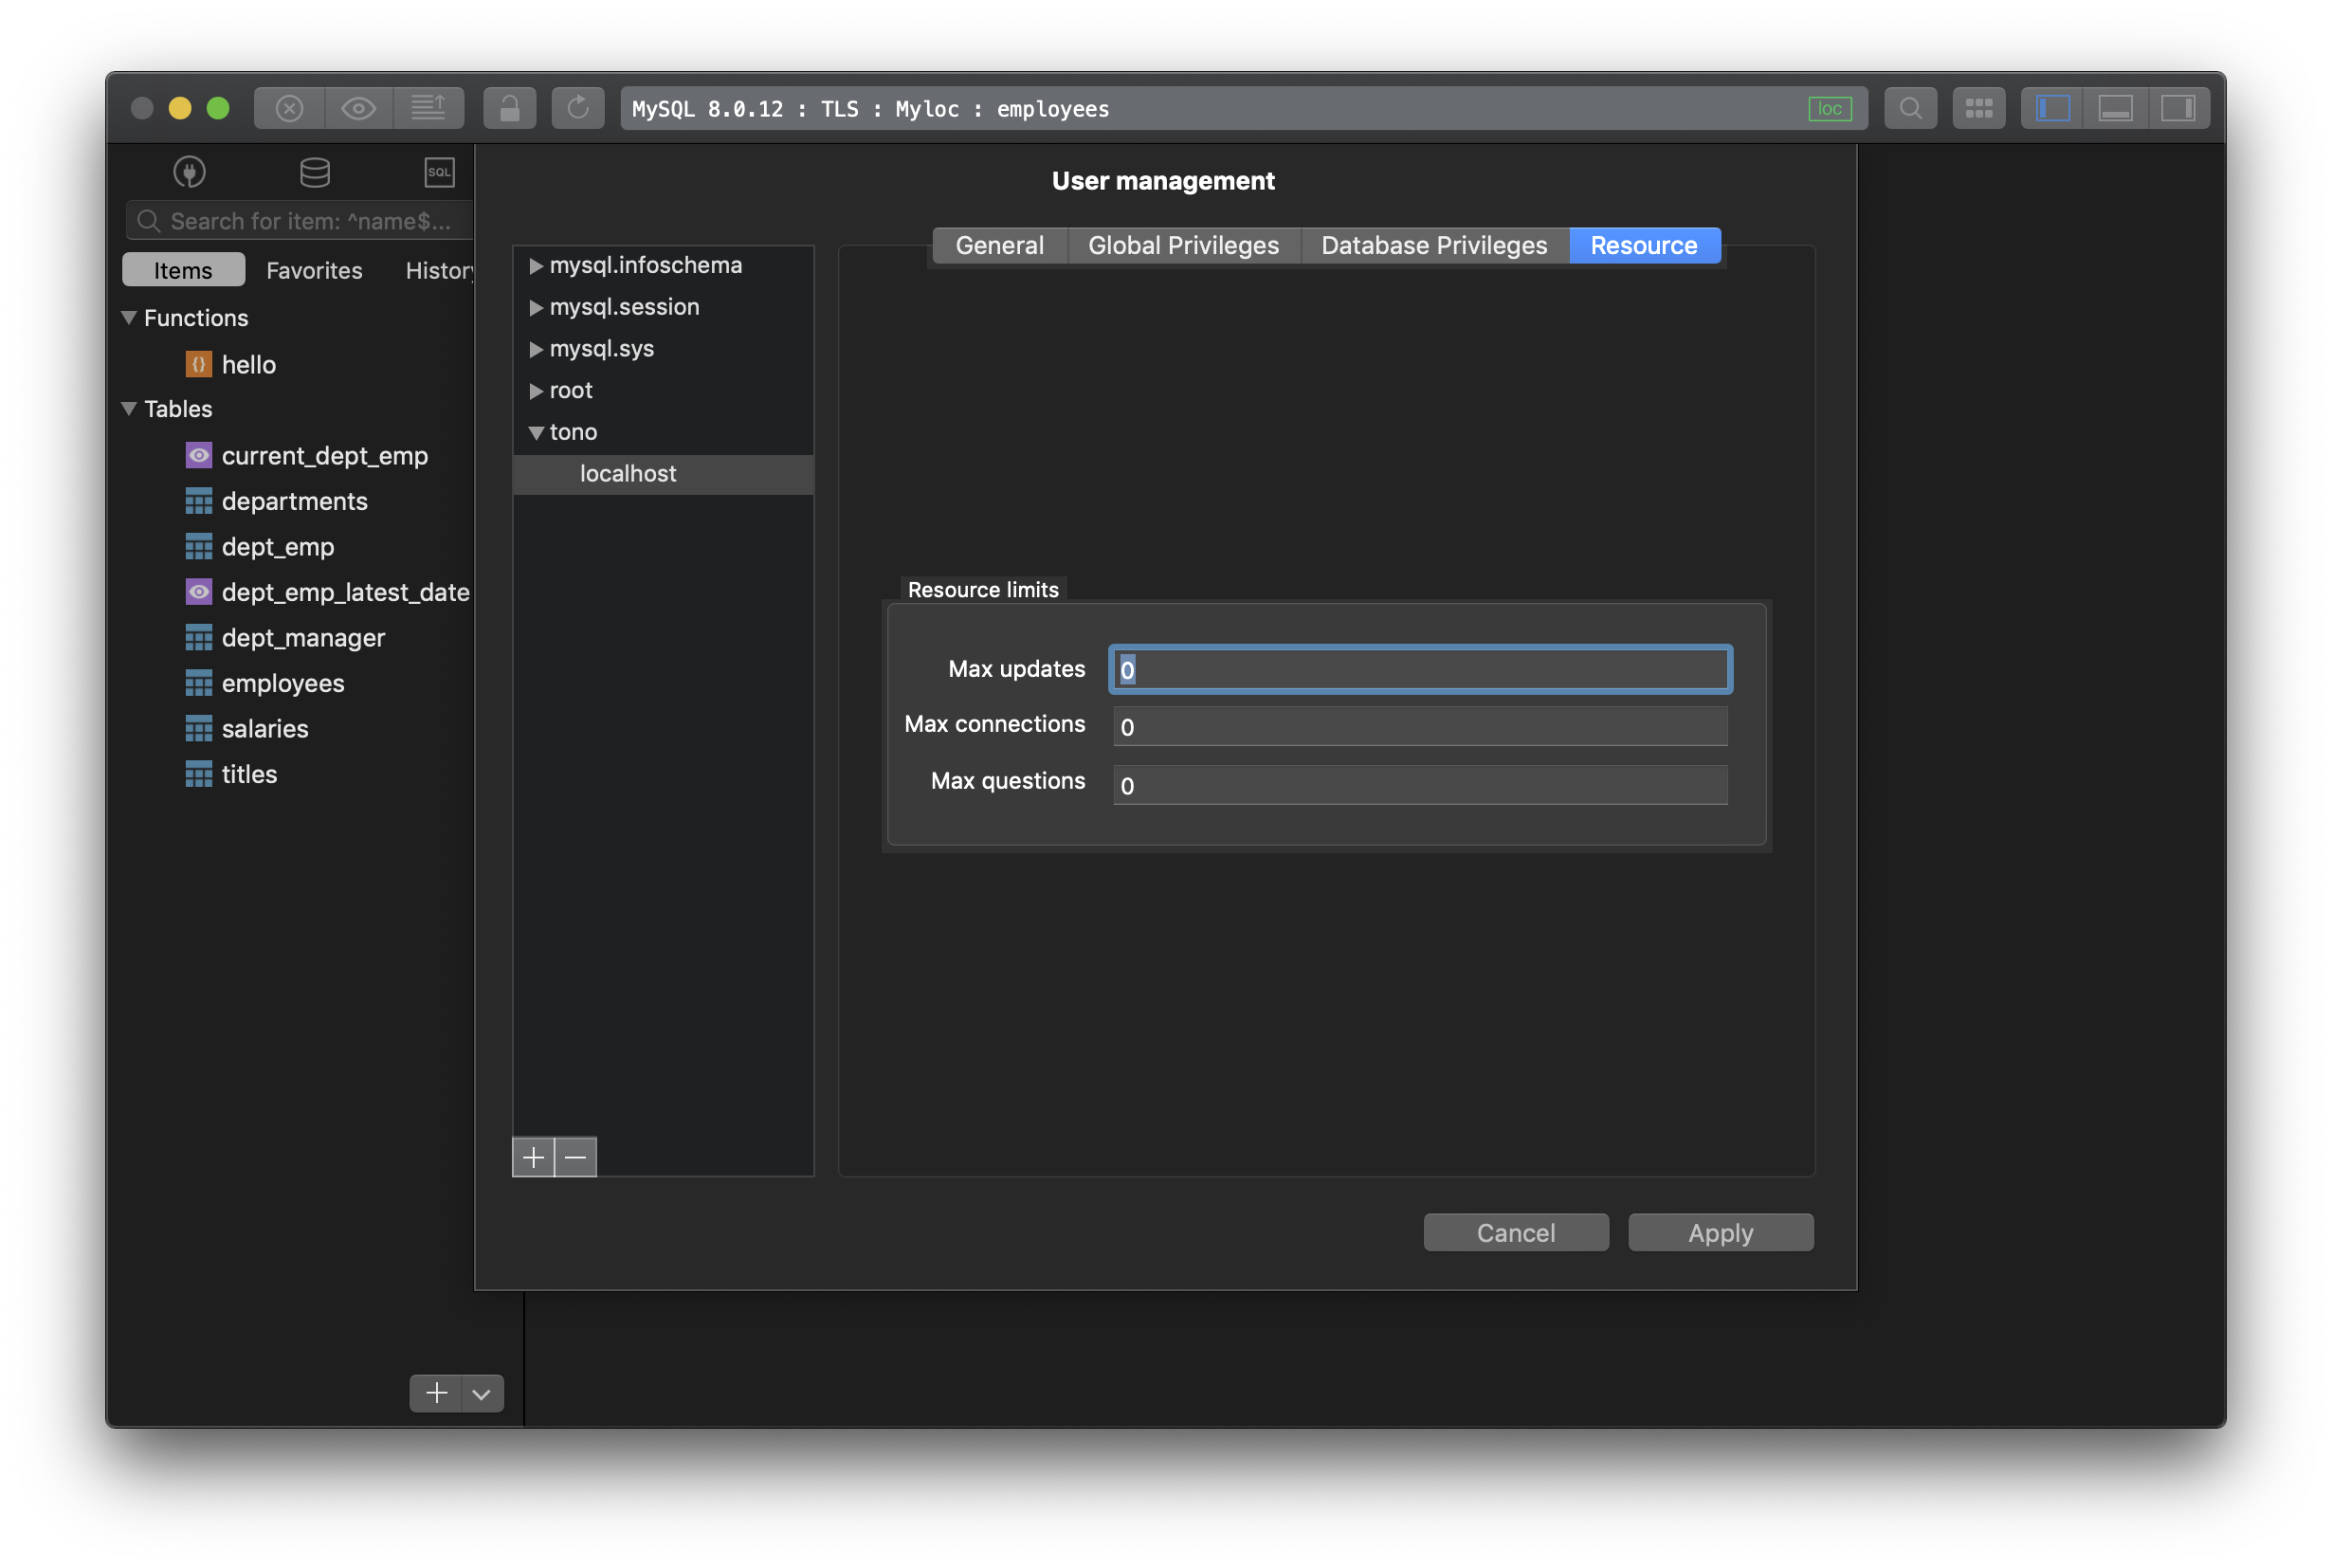
Click Apply to finish creating the new MySQL user.
To update the privileges of a current MySQL user
From the User Management window, TablePlus lists all current users of the database on the left side. You can select any user to view the current privileges and make changes if needed.
If you want to remove all of the rights assigned to the selected user account, you can go back to edit, uncheck the privileges and then save the changes.
To delete a user, select the user and hit - button near the bottom left then save.